A snapped ski can feel like the end of a perfect day on the slopes, but don't despair! With a little know-how and the right materials, you can often repair even significant damage, extending the life of your beloved skis and saving yourself the cost of a replacement. This guide focuses on a crucial repair technique: fixing broken skis using a fiberglass patch. This method is surprisingly effective for repairing cracks and even some types of breaks, offering a durable and reliable solution to get you back on the mountain quickly.
Fiberglass patching requires a bit of patience and precision, but the results are well worth the effort. It's a significantly more robust repair than simple glues alone, providing considerable strength and preventing the damage from spreading further. Ready to learn how to breathe new life into your damaged skis? Let's dive into the step-by-step process of creating a strong and lasting fiberglass patch.
Preparation and Safety Guidelines
- Skis
- Dremel tool with rotary saw bit
- Straight edge
- Vacuum
- Automotive body filler
- Hardener (for resin)
- Medium grit sandpaper
- Sanding block
- Steel scraper
- Petroleum jelly
- Duct tape
- Fiberglass cloth
- Fiberglass matting
- Polyester resin
- Brush
- Clamps
- Wear safety glasses and a dust mask to protect your eyes and lungs from fiberglass dust and resin fumes. Fiberglass particles are irritating and inhaling them can be harmful.
- Work in a well-ventilated area. Epoxy resin and hardeners release fumes that can be toxic. Ensure proper ventilation to avoid breathing problems.
- Use gloves to protect your skin from the resin and hardener, which can cause irritation or allergic reactions. Follow the manufacturer's instructions for handling and disposal of these materials.
Step-by-Step Instructions
Preparation and Damage Assessment
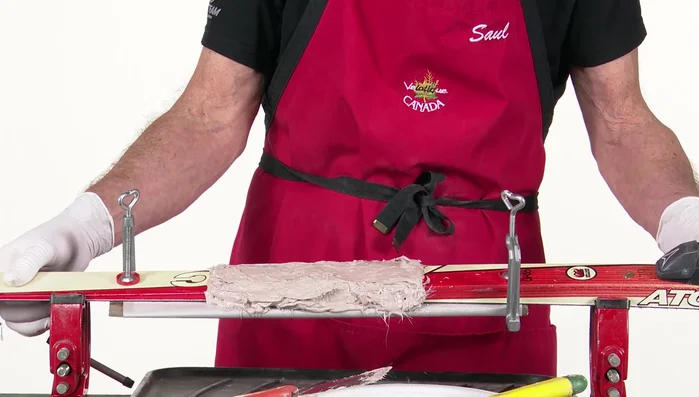
- Assess the damage and clean the fracture site. Remove broken fiberglass and level the foam core.
Creating the Mold
- Create a mold using the good ski. Line up both skis to match the broken area. Use duct tape as a spacer.
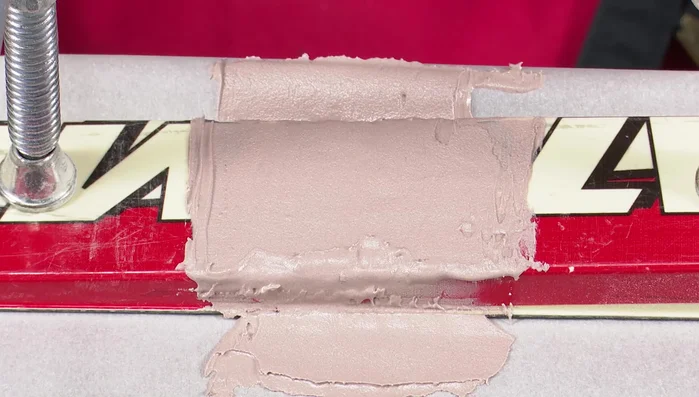
Initial Fill and Leveling
- Fill the fracture site with automotive body filler, mixed with hardener.
- Sand the body filler down until level with the surrounding ski surface.
- Apply a second layer of body filler if needed to ensure a level patch.
- Use a petroleum jelly-coated steel scraper to further flatten and level the surface. Clamp and press down. Wait for curing.

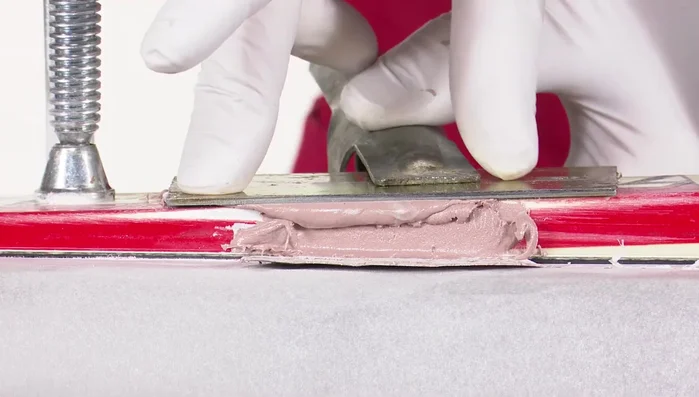
Initial Fill and Leveling Fine Sanding and Refinement
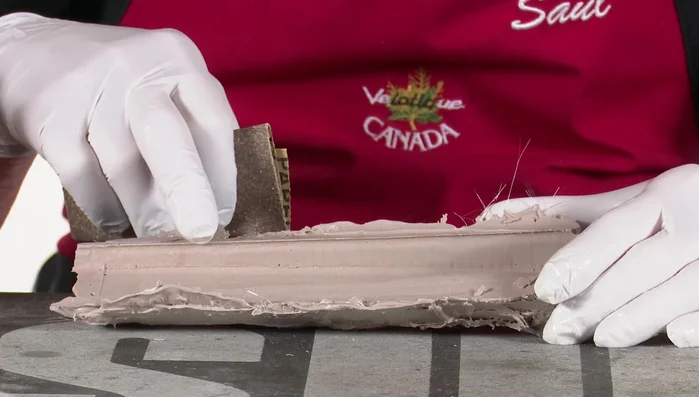
- Sand the body filler patch again using medium grit sandpaper on a sanding block. Use sandpaper wrapped around a flat object to finish the side walls.
Fine Sanding and Refinement Creating the Fiberglass Mold
- Create a mold extending beyond the fracture area using body filler reinforced with fiberglass matting. Apply petroleum jelly as a mold release agent.
- Let the mold cure overnight.
- Carefully remove the mold after curing. Sand any excess filler.
Creating the Fiberglass Mold Fiberglass Patch Preparation
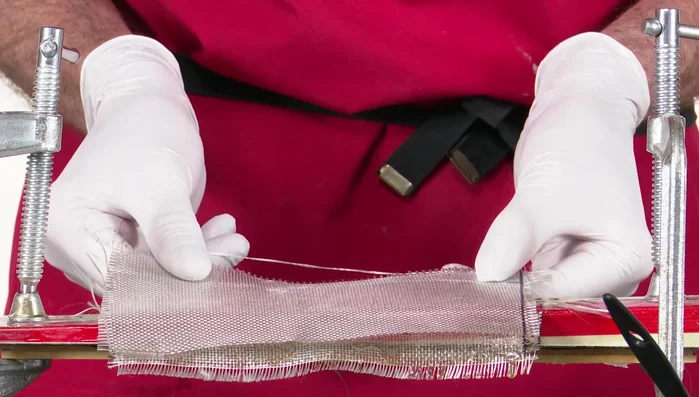
- Cut two pieces of fiberglass cloth to fit the mold dimensions. Dry fit to ensure proper fit.
- Roughen the ski surface for adhesion, apply petroleum jelly to the inside of the mold to prevent sticking.
Resin Application and Curing
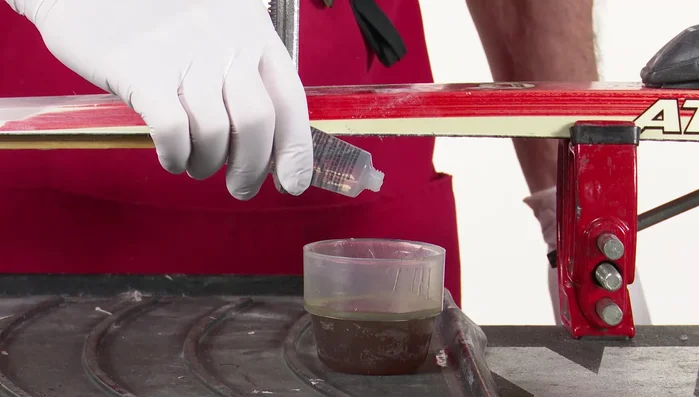
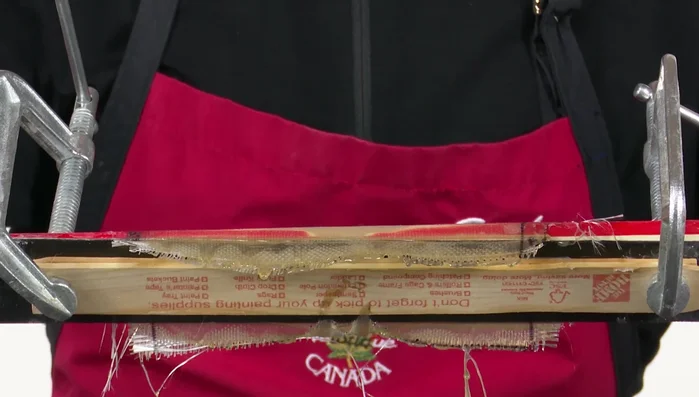
- Mix polyester resin and hardener. Brush a coating of resin onto the ski’s repair area.
- Apply the fiberglass cloth layers, saturating each with resin. Ensure complete coverage of the repair area. Carefully place the mold and clamp to ensure proper bonding.
- Let the resin cure for 24 hours.
Resin Application and Curing Mold Removal and Finishing
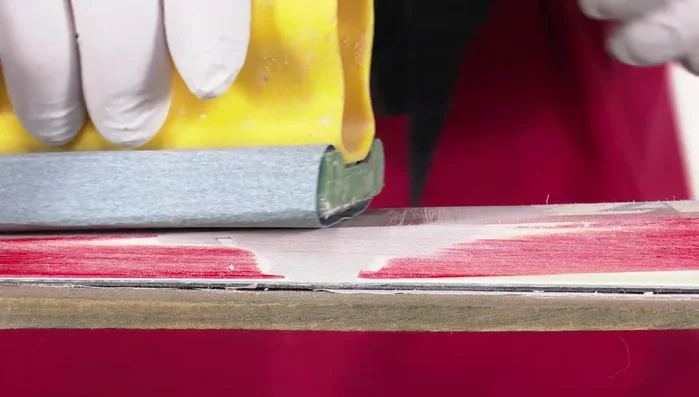
- Remove the mold and inspect the patch. Fill any air gaps with additional resin if necessary.
- Trim the excess material from the edges of the ski using a steel guide to protect the ski base. Sand the edges flush.
Mold Removal and Finishing Cosmetic Finish
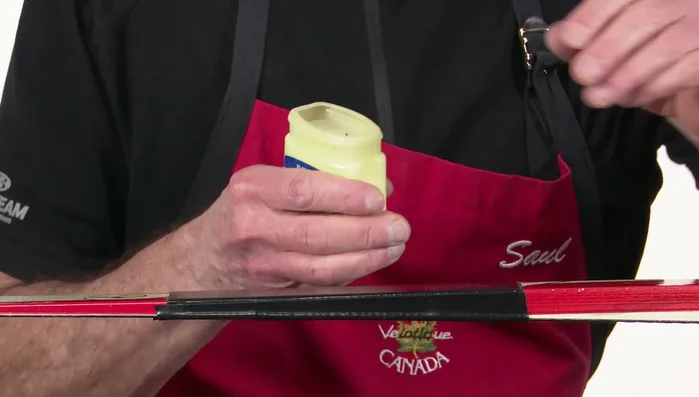
- Apply a final cosmetic layer of polyester resin, let it cure overnight.


Read more: Top 7 Best Ski Gloves for Unforgettable Winter Adventures
Tips
- Use a generous amount of petroleum jelly as a mold release agent to prevent the body filler from sticking to your good ski.
- Ensure complete saturation of the fiberglass cloth with resin for a strong, durable repair.
- Use a steel guide when trimming excess material to prevent damaging the ski base.