Conquering the slopes with confidence starts with a perfectly dialed-in snowboard setup. For Jones Snowboards riders, achieving that optimal feel hinges on correctly mounting your bindings. A poorly mounted binding can lead to discomfort, reduced control, and even injury, robbing you of the exhilarating experience the mountain offers. This is where precision and understanding are key, transforming a potentially frustrating process into a rewarding one that enhances your performance. Choosing the right stance, angle, and placement significantly impacts your riding style and overall enjoyment.
This comprehensive Jones Binding Mounting Guide breaks down the process into easy-to-follow steps, empowering you to achieve that perfect snowboard setup and unleash your full potential on the mountain. From understanding your preferred stance width and angles to the precise execution of the mounting procedure, we'll walk you through every detail, ensuring your Jones snowboard is ready for any terrain. Let's get started!
Preparation and Safety Guidelines
- Jones bindings
- Jones snowboard
- Screwdriver
- Boots
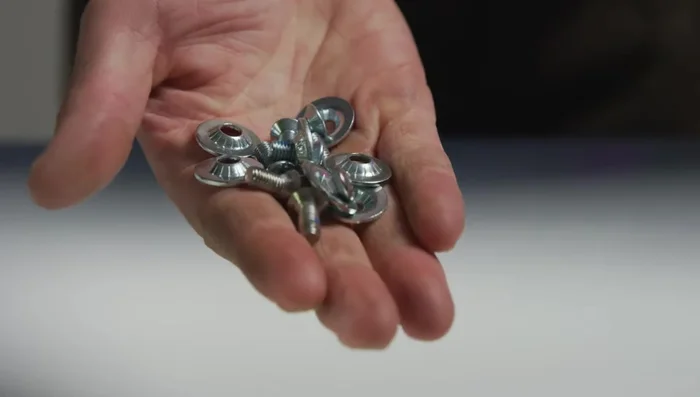
- Always use the correct hardware for your snowboard and bindings. Using incorrect screws or washers can lead to binding failure and serious injury.
- Ensure your bindings are mounted correctly according to the manufacturer's instructions and your stance. Improper mounting can affect performance and increase the risk of injury.
- After mounting, double-check the tightness of all screws and hardware before every ride. Loose hardware can lead to binding failure and serious injury.
Step-by-Step Instructions
Setup and Preparation
- Choose a good mounting location (flat, sturdy table or workbench).
- Gather your tools and boots.
- Prepare the mounting hardware (screws and washers).

Setup and Preparation Prepare the Binding
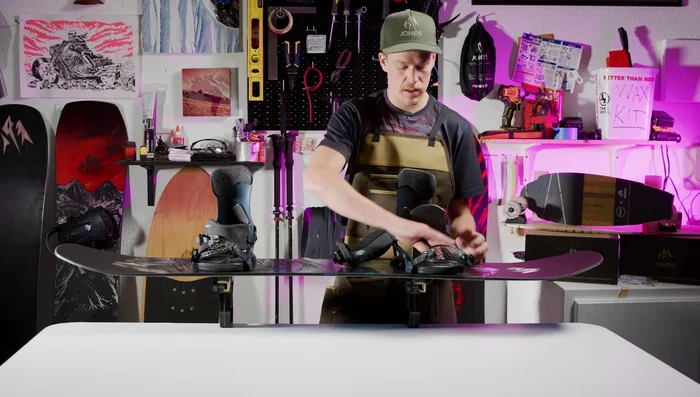
- Open the Jones binding footbed and click the toe strap to keep it out of the way.
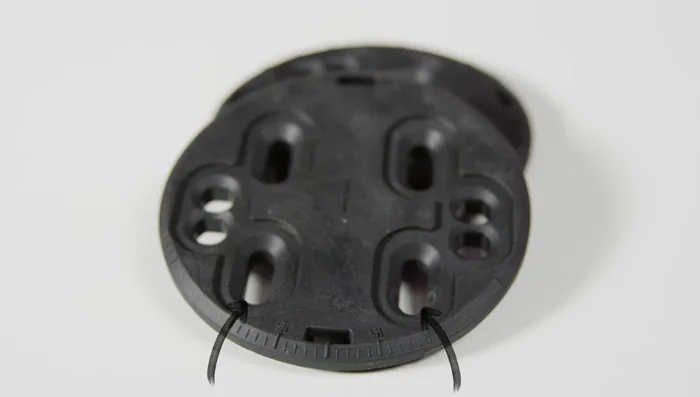
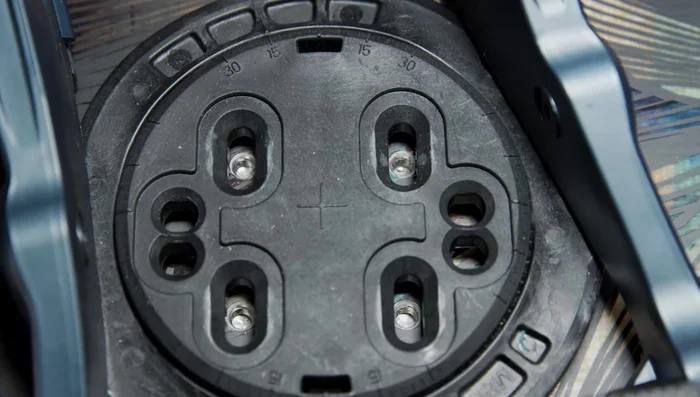
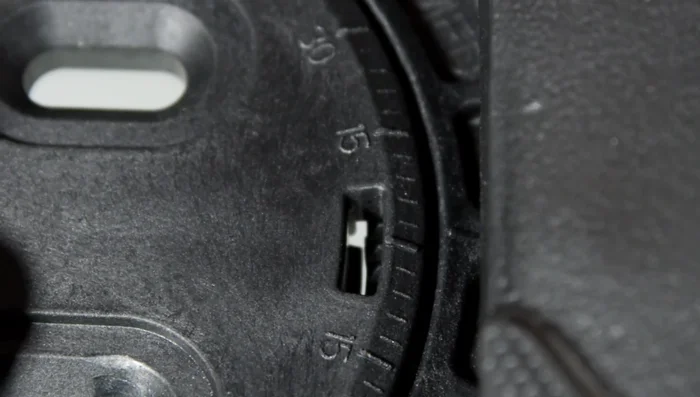
- Insert the 4x4 disc into the binding, ensuring the holes closer to the edge are towards the front (toe side). Align the center degree marking on the disc with the center marking on the binding post (zero degree position).
Prepare the Binding Determine Stance and Binding Placement
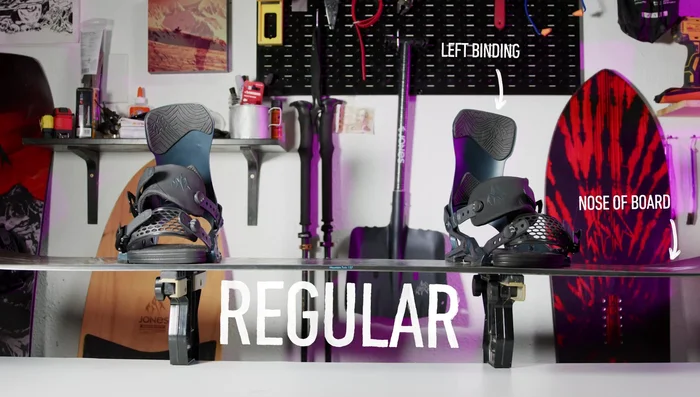
- Determine your stance (regular or goofy). Use the board's reference stance markings as a starting point, potentially adjusting slightly wider for freestyle or narrower for surf-style riding.
Determine Stance and Binding Placement Mount Front Binding
- Position the front binding over the reference stance holes on the board's insert pack, with the buckles on the outside. Start with one screw without a washer for easier insertion, then add the remaining screws with washers, tightening slightly.
- Check the binding's centering using your boot. The boot should reach the edge of the toe ramp, not hang over the heel edge.
- Adjust binding position if needed by loosening screws and sliding, or flipping the 4x4 disc 180 degrees.
Mount Front Binding Mount Rear Binding
- Repeat steps 7-9 for the back binding, adjusting the stance angle (positive 3°, negative 3°, or 0°).
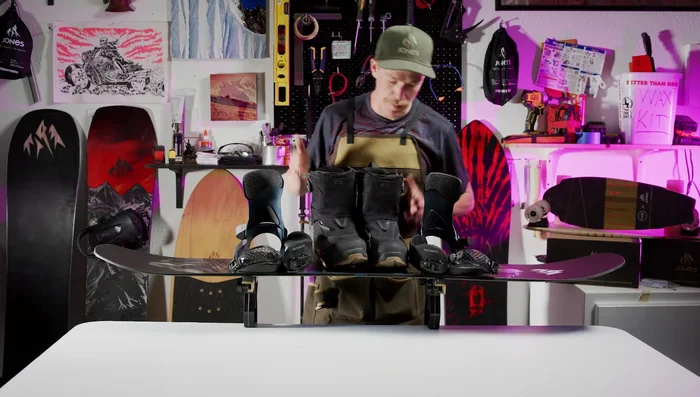
Mount Rear Binding Strap and Lean Adjustment
- Adjust straps and forward lean. Center straps over boots, adjust buckles. Choose between surf mode and freeride mode for the heel strap based on your riding style.
- Adjust forward lean on the highback. Start with minimal forward lean and adjust based on preference; more forward lean increases heel edge power.
Strap and Lean Adjustment


Read more: How to Wax Your Snowboard for Optimal Speed and Longevity
Tips
- Use a number two screwdriver for the best fit and to avoid stripping screws.
- All-mountain stance is a good starting point: front foot 12-24° positive, back foot -3° to +3°.
- Don't overtighten screws initially; ensure the binding is secure before fully tightening.
- Experiment with stance angles and forward lean to find what feels best for your riding style. You can always adjust later.